Introduction
Visuals are an important part of online content. Whether you have a blog, an online store, or a business website, the quality and performance of images play a big role in how users experience your site. Image optimization is the process of reducing the file size of your images while keeping their quality good. This not only makes your website load faster but also helps it rank better on search engines. In this article, we’ll discuss why image optimization is important, how to optimize images, and the tools you can use to make the job easier.

Importance of image optimization for site performance
- Faster Website Loading: Large, unoptimized images can slow down your website, making it frustrating for users. A fast-loading website keeps visitors happy and more likely to stay on your site.
- Better Search Engine Rankings: Search engines like Google consider how fast your website loads when deciding where to rank it. Optimized images help your site load faster, which can improve your ranking in search results.
- Less Data Usage: Optimized images use less bandwidth, which is helpful for both website owners and users, especially those with limited data plans or slower internet connections.
- Improved User Experience: High-quality, quick-loading images make your website look professional and appealing, improving the overall user experience.

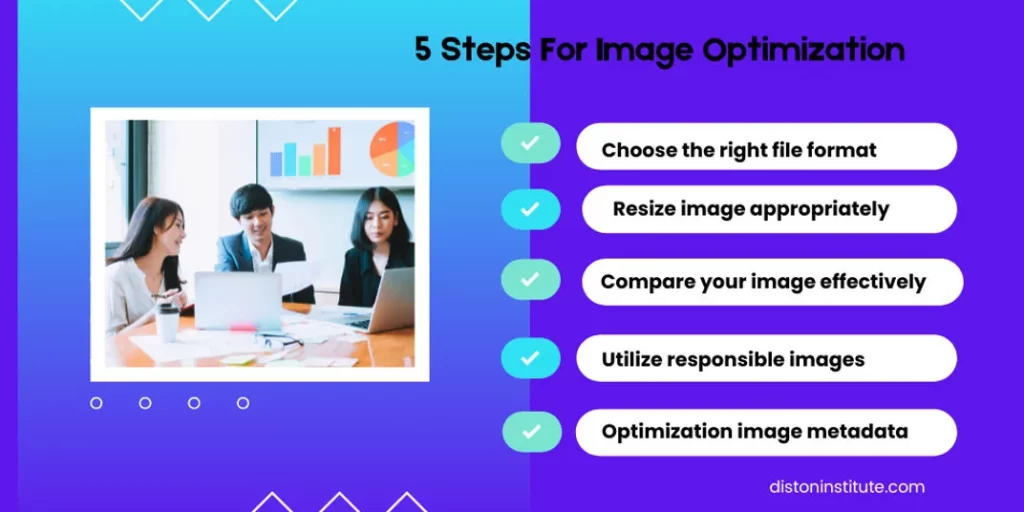
5 Steps For Image Optimization
1. Choose the right file format for image optimization
Choosing the right file format for image optimization is essential to ensure that your images are displayed efficiently and maintain quality on your website. Here are some common file formats and their best uses:
- JPEG (Joint Photographic Experts Group): JPEG is great for photographs or images with a lot of colors and gradients. It uses lossy compression, meaning it can reduce file size significantly while maintaining good image quality. This format is widely supported and is ideal for photographs.
- PNG (Portable Network Graphics): PNG is suitable for images with transparency or simple graphics. It uses lossless compression, preserving image quality but resulting in larger file sizes compared to JPEG. PNG is recommended for images with text, logos, or graphics with sharp edges.
- WebP: WebP is a modern image format developed by Google that provides both lossy and lossless compression. It offers smaller file sizes than JPEG and PNG without compromising quality. However, WebP may not be supported by all browsers yet.
Also Read : Image Submission Sites
2. Resize image appropriately
- Determine the Required Dimensions: Identify the specific dimensions needed for the image on your website. This could vary based on where the image will be displayed, such as in a gallery, header, or blog post.
- Use Image Editing Software: Utilize image editing tools like Adobe Photoshop, GIMP, or online editors to resize the image to the required dimensions. Maintain the aspect ratio to prevent distortion.
- Save the Resized Image: Once you have resized the image, save it in the appropriate file format based on the content of the image (JPEG for photographs, PNG for graphics with transparency, etc.).
3. Compare your image effectively
- Visual Inspection : Start by visually inspecting the images side by side. Look for differences in colors, clarity, sharpness, and overall quality.
- Zoom In : Zoom in on specific areas of the images to check for details and pixelation. This can help you identify any differences in resolution or compression artifacts.
- File Size Comparison : Compare the file sizes of the images. Smaller file sizes generally indicate more efficient compression, but be cautious not to sacrifice too much quality for a smaller size.
4. Utilize responsible images
- Copyright and Licensing : Make sure you have the right to use the images you choose. Opt for images that are either in the public domain, have a Creative Commons license, or are royalty-free.
- Authenticity and Accuracy : Use images that accurately represent the content or message you are trying to convey. Avoid using misleading or manipulated images.
- Diversity and Inclusivity : Choose images that reflect diversity and inclusivity to promote representation and avoid stereotypes.
Implement secret for various screen size
When implementing secrets for various screen sizes in web development, you can utilize media queries in CSS. By setting up specific CSS rules within different media queries, you can tailor the appearance of your website or application to suit various screen sizes. This approach ensures that your content remains responsive and visually appealing across different devices, from mobile phones to desktop computers. By structuring your CSS code with media queries, you can create a seamless and optimized user experience regardless of the screen size.
5. Optimization image metadata in points
- File Names : Use descriptive file names that include relevant keywords related to the image content. Avoid generic file names like “IMG001.jpg” and instead opt for specific names like “red-rose-bouquet.jpg”.
- Alt Text : Add concise and accurate alt text to describe the image content for users who may not be able to view the image. Alt text also helps search engines understand the context of the image for better indexing.
- Title Tags : Utilize title tags to provide additional information about the image. This text appears as a tooltip when a user hovers over the image and can contribute to SEO efforts.
- Image Size : Optimize image size to reduce loading times and improve website performance. Use compressed images without compromising quality to ensure faster loading speeds.
- Metadata : Include relevant metadata such as copyright information, author details, and image captions to provide additional context to users and search engines.

Tools for Image Optimization
There are many tools available that can help you optimize images easily:
- Adobe Photoshop: Offers powerful features for editing and optimizing images, including the “Save for Web” option to adjust quality and file size.
- TinyPNG: An online tool that compresses PNG and JPEG images, reducing file size without losing quality.
- ImageOptim: A tool for Mac that optimizes images without losing quality, supporting various file formats.
- Squoosh: A web-based tool from Google that offers different compression options and formats, along with real-time previews.
- WP Smush: A popular WordPress plugin that automatically compresses and optimizes images when you upload them to your site.
1. What is image optimization?
Image optimization is the process of reducing the file size of images without compromising their quality, ensuring faster loading times and better performance on websites.
2. Why is image optimization important for my website?
Optimized images improve page load speed, enhance user experience, reduce bounce rates, and positively impact SEO rankings.
3. Can optimizing images improve my website’s SEO?
Yes! Search engines favor fast-loading sites, and well-optimized images with proper alt text can improve search visibility and accessibility.
4. What is the best image size for web use?
The optimal image size for web use typically ranges from 800 to 1200 pixels in width, depending on the layout and design of your website.
